North Water Airbag Tiedown Kit
Regular price $189.95 Save $-189.95This tie down kit can be used to secure two large end bags in a solo boat or two small bow and stern bags and one large centre bag in a tandem boat.
- Keeps airbags firmly in place
- Accommodates any size or shape of airbag
"Airbag Tiedown Kit w/ Adhesive" includes a 100 mL can of Vinyl-Tec 2000 PVC Adhesive.
Specs
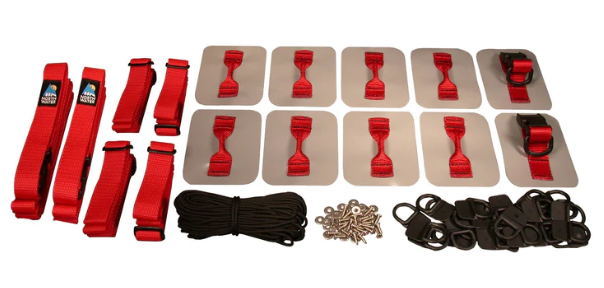
Air Bag Tie-Down Kit 40CO-20
Includes:
- 2 centre straps
- 2 D-rings with 1" Side Squeeze Buckles
- 4 front straps
- 8 Light Weight D-rings
- 28 lacing eyelets
- 28 stainless screws and washers
- 50' of 1/8" Paraline
These kits are used to secure flotation bags into your canoe. This kit contains everything you need to secure two large end bags in a solo boat, or two small bow and stern bags and one large center bag for a tandem boat. Installation is quite simple and should only take you about 30 minutes.
Contents Include:
- 2 - 1" X 7' Center Straps
- 2 - Center Strap Anchors (1" d-ring with buckle)
- 4 - 1" X 3.5’ End Straps
- 8 - End Strap 1" D-ring
- 28 - Lacing D-rings
- 28 - Stainless Screws and Washers
- 50 Ft. of Parachute Cord
For Installation You Will Need:
- Pencil or felt marker
- Mineral spirits (Toluene or MEK)
- Vinyl-Tec 2000 Adhesive
- Piece 80 to100 grit sandpaper (for Kevlar and fiberglass boats)
- Heat gun or hair dryer (optional)
- Drill and 3/16" bit
- Clean-up rag
- Rubber gloves
Instructions:
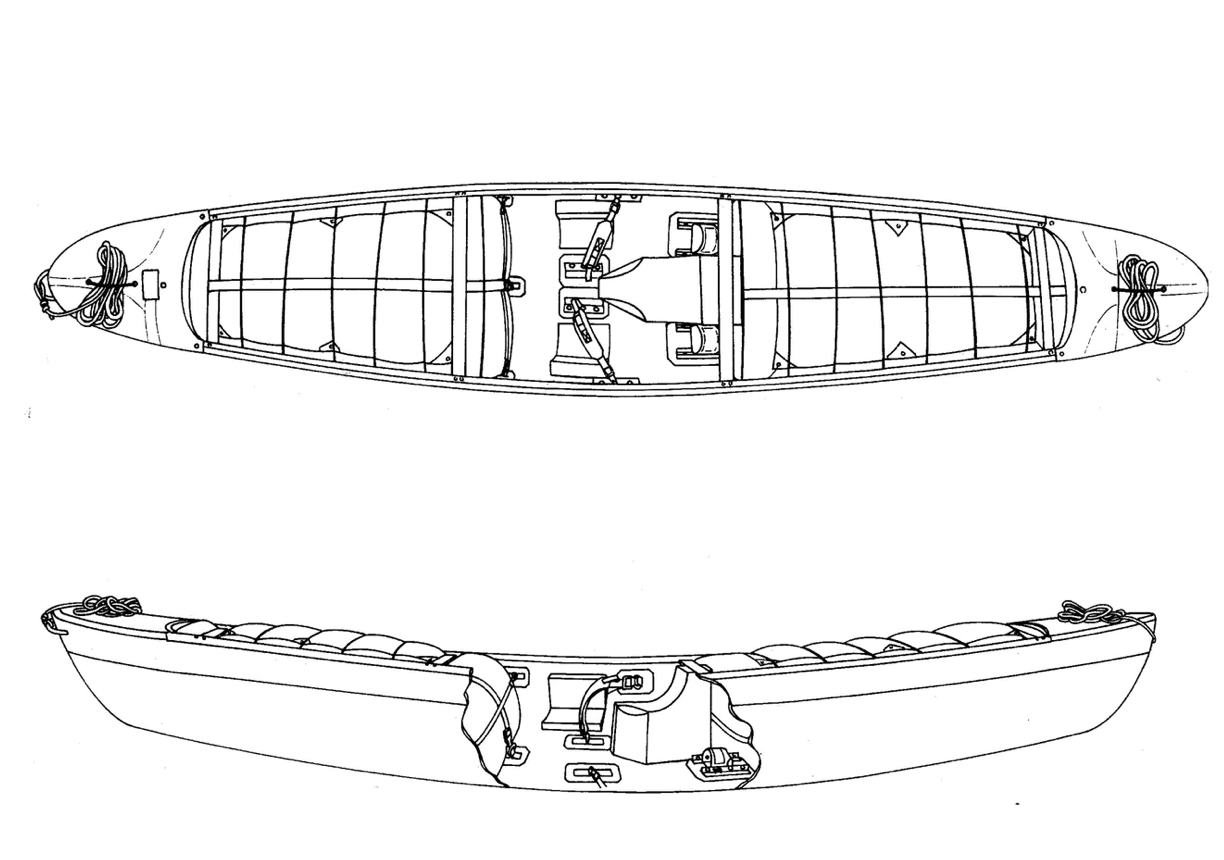
Note: Your air bags should be installed so when fully inflated all the lines and straps fit snuggly against the contours of the inflated bags. This not only secures them in place but reduces the likelihood of anything snagging in the lines. See the diagram above.
If your boat has pre-installed lacing anchors you can skip steps 1 and 2.
1.
Determine the location of the air bag you wish to install by placing it into the boat partially inflated. Flatten down the air bag by pushing it level with the gunnels. For large center bags, place a mark on the gunnel at each end of the airbag, for solo and end bags put a mark where the bag ends. Making sure the solo bags are pulled well into the bow and stern to avoid pockets where water can collect. From those marks measure 4 to 5 inches toward the center of the bag. This will be the location of the first Lacing D-ring on the gunnel. See the above diagrams.
2.
Remove the air bag and measure the distance between the two marks and determine how many D-rings you need for each side. They should be approximately 4 inches apart. Place a mark at each location. Now place the plastic tab on the Lacing D-ring on the underside of the gunnel and drill a 5/64" pilot hole into the tab and the gunnel, secure them using the screws and washers provided. Repeat using the same layout for the gunnel opposite the one you just finished.
3.
To install the Center Strap Anchor, measure 2 inches toward the center of the bag from where the bag ends do the same for the other end if it is a center bag.
4.
To install the D-rings for the End Straps, measure approximately 8 inches down from the underside of the gunnel. Again making sure they are placed about 2 inches in from the end of the bag. (See diagram)
Gluing in the D-rings and anchors should be performed in a well ventilated area.
Vinyl and ABS:
Clean both surfaces with Toluene or Methyl-ethyl-ketone.
Apply glue to both surfaces. Let dry for 15+ minutes.
Using a hair dryer or heat gun, slowly heat surfaces to reactivate glue. Join together, working from center outward to avoid trapping air bubbles. Bond is immediate. Let dry 6 to 8 hours.
Without hair dryer or heat gun, apply a thin 2 coat to both surfaces. Join together. Let dry 6 to 8 hours.
Fiberglass and Kevlar:
Roughen boat surface well with 80 grit sandpaper. Clean both surfaces with Toluene or Methyl-ethyl-ketone. Apply glue to both surfaces. Let dry 15+ minutes. Apply another coat to both surfaces. Press together working air bubbles out. Let dry 8 to 10 hours.
Caution
This product has been designed to enhance your paddling experience, but remember that, as with any other piece of equipment used in a water environment, it has its limitations, restrictions and potential dangers. It has been designed for use in water conditions that require experience and skill. We strongly urge against using this product if you do not possess the skills necessary to recognize the dangers of such conditions. Upon purchasing North Water equipment the purchaser/user assumes all risks of injury or damage to himself, herself, or others as well as loss or damage to any property. In purchasing/using these products (s)he agrees to hold harmless North Water Holdings Ltd., their officers, employees, agents, and representatives from any liability for injury or damage of any kind that may be suffered by the purchaser or others through the use of these products whether caused through negligence or otherwise.